Covermate Freestyle
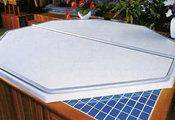
THE COVER LIFT SOLUTION FOR ROUND, OCTAGON AND UNIQUELY SHAPED SPAS
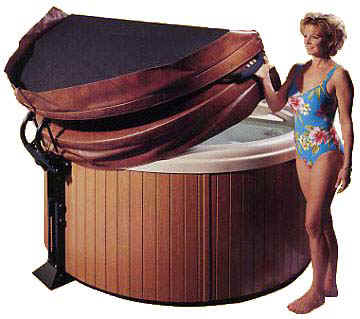

Removing your spa cover off should be easy! Now it can be with the Covermate FreeStyle spa cover lift. The design of the Cover mate Free Style is especially suited for round, octagon and other non-rectangular spas. The Cover Mate FreeStyle places the spa cover in an upright position, and requires as little as 12" of clearance behind the spa. Covermate FreeStyle's mounting system provides extreme strength and mounts behind the spa on a heavy "post" style mounting system. Your cover will be so easy to lift off your spa that a child can do it! Saves wear and tear on your cover too. The Covermate FreeStyle will add life to your spa cover because the cover seam is usually the first area to fail. By using a cover lifter such as the Covermate FreeStyle the cover seam will last much longer since the stress on the seam is reduced greatly. Made of aluminum with black powder coated finish and rubber hand grips. Variable mounting heights can be achieved depending on available space behind the spa. Includes Covermate Free Style lifter and all necessary mounting hardware. Clearance needed behind spa is 12 inches. Fits up to an 8 foot spa.
- Requires approximately 20 inches clearance behind spa
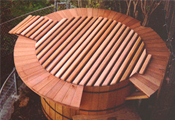
- Designed to work on round and uniquely shaped spas
- Adjustable mounting base simply slides under the spa
- Works on virtually any spa up to 43 inches tall and 95 inches wide
Installation / Operating requirements and limitations |
||||||
| rear clearance | side clearance | spa/cabinet shape limitations | mounting location | spa corner shape limitations | type of lift assistance | min. [max.]cover width |
| 12" | 2" (0 if trimmed) | none | back of spa | none | gas shock | 69" (60" if lift is trimmed) |
See the complete Cover Lift Configurater to compare all cover lifters side by side. |
||||||


![]()
Click on pictures above for a larger view
Installation Instructions for the Covermate Freestyle
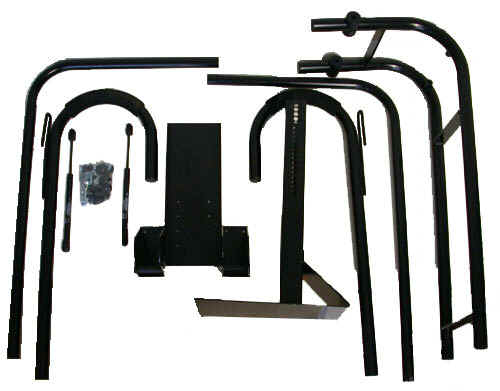
What's actually inside the box.
Instructions for installing onto a traditional wooden hot tub begin further down the page, HERE.
Step #1:
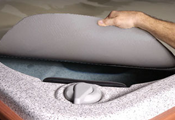
Lay the spa cover on the spa in the fully closed position . Determine where the midpoint of the spa is and slide the Lower Bracket assembly under the spa (do not attach to spa at this time). See Fig. 1.
Step #2:
Attach the two Ball Studs to the Pivot Arm assembly and the two Ball Studs to the Upper Bracket assembly. See fig 2A and 2B.
Step #3:
Using the 3/8" x 3" Bolts and 3/8" Lock Nuts, attach the Pivot Arm assembly to the Upper Bracket assembly (see fig. 3). Note: Overtighten bolts, then back off Nut until Pivot Arm moves freely.
Step #4:
Next lay the Pivot Arm assembly on top of the spa cover and match up the Upper and Lower Bracket assemblies together and connect with the 4 3/8"x3/4" Bolts and Lock Nuts (see fig. 4).
Step #5:
Insert the Inner Support Arms into the Pivot Arm assembly. Note: The long end of the Support Arm connects to the Pivot Arm.
Next slide the Outer Handle onto the Inner Support Arms (see fig. 5).
Note: There is a right and left Outer Handle - when placed on their appropriate sides the U-shaped Retainer Clips face downwards. Position the Outer Handle Assembly so that the Retainer Clip slides under the cover's hinge - between the two cover halves. Do this on both the left and right side of the cover.
Next position and align the Inner Support assembly and align the Inner Support assembly and the Pivot Assembly so that the Inner Support Arms are running parallel to cover hinge, approximately 3/4" away from the hinge (see fig. 6).
Step #6:
With the Tube assembly and positioning complete, insert the 5/8" Self Tapping Screws into the predrilled pilot holes.
Note: A trick to getting the cover level - put one Screw in the middle pilot hole of the Pivot Arms. Flip the cover open and lift into open position. Stand back and view which side needs to be raised or lowered to be level.
Step #7:
Using a 1/16" drill bit, predrill the spa cabinet and insert the #10 x 1" screws, attaching the Bracket assembly to the spa.
Step #8:
Using the Covermate, lift the folded cover off the spa. Snap the Gas Shocks onto the Ball Studs (black body on top) and snap the Black Beauty Caps (screw head covers) on. You are done!
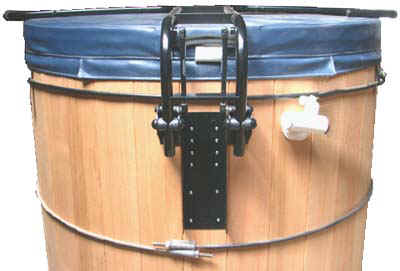
Additional instructions for installing the Covermate Freestyle onto traditional wooden hot tubs.
Installation onto a wooden hot tub is basically the same, with a few exceptions/modifications. Because of interference from the bands and the additional height of most wooden hot tubs, the Lower Bracket assembly is NOT used.
Step #1:
Lay the spa cover on the spa in the fully closed position.
Step #2:
Attach the two Ball Studs to the Pivot Arm assembly and the two Ball Studs to the Upper Bracket assembly. See fig 2A and 2B.
Step #3:
Using the 3/8" x 3" Bolts and 3/8" Lock Nuts, attach the Pivot Arm assembly to the Upper Bracket assembly (see fig. 3). Note: Overtighten bolts, then back off Nut until Pivot Arm moves freely.
Step #4:
Note: For wooden hot tubs less than 6' in diameter the Outer Handles and Inner Support Arms (the long end) need to be shortened 6" (see fig. 5). After cutting the Outer Handles the inside of the tubing should be "cleaned up" (reamed out, or sanded smooth) to allow the Inner Support Arms to slide freely inside.
Next lay the Pivot Arm assembly on top of the spa cover and insert the Inner Support Arms into the Pivot Arm assembly. Note: The long end of the Support Arm connects to the Pivot Arm.
Next slide the Outer Handle onto the Inner Support Arms (see fig. 5).
Note: There is a right and left Outer Handle - when placed on their appropriate sides the U-shaped Retainer Clips face downwards. Position the Outer Handle Assembly so that the Retainer Clip slides under the cover's hinge - between the two cover halves. Do this on both the left and right side of the cover.
Next position and align the Inner Support assembly and align the Inner Support assembly and the Pivot Assembly so that the Inner Support Arms are running parallel to cover hinge, approximately 3/4" away from the hinge (see fig. 6).
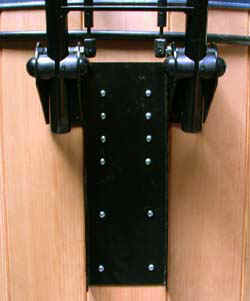
The inner Support Arms should slide into the Pivot Arm far enough so that the Upper Bracket lays flat against the side of the hot tub. The Upper Bracket should also rest wholly on one stave (the cover and lifter may need to be rotated slightly to achieve this). See figure #5a.
Figure 5a
Step #5:
With the Tube assembly and positioning complete, attach the Upper Bracket assembly to the hot tub with 2 - #10 x 1" screws (see figure #5a). Insert the 5/8" Self Tapping Screws into the predrilled pilot holes.
Note: A trick to getting the cover level - put one Screw in the middle pilot hole of each Pivot Arm. Flip the cover open and lift into open position. Stand back and view which side needs to be raised or lowered to be level.
Step #6:
Insert the #10 x 1" screws, attaching the Bracket assembly to the hot tub. Note: Holes will need to be drilled towards the bottom of the Upper Bracket assembly for additional screws (see fig. #7).
Figure #7
Step #7:
Using the Covermate, lift the folded cover off the spa. Snap the Gas Shocks onto the Ball Studs (black body on top) and snap the Black Beauty Caps (screw head covers) on. You are done!