Covermate Easy
A simple and proven design, yet more durable and with a touch of class!
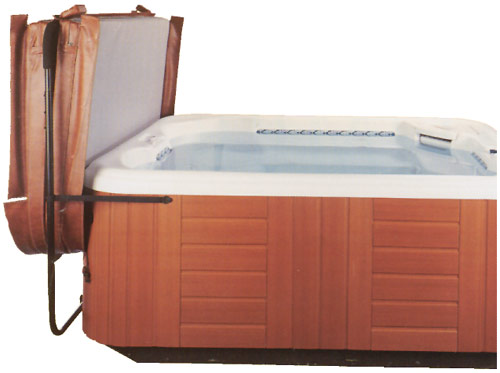

Made of black powder coated aluminum with screw caps, bolt covers and rubber grips, the CoverMate Easy truly looks good! With no moving parts and a UV-resistant nylon catch strap, the Cover Mate Easy is trouble free. Because the Cover Mate Easy is made of larger-size tubing than look-alikes, twisting and torquing when removing the cover is virtually eliminated.
- Requires just 18 inches clearance behind spa
- This basic lift simply looks better than the competition
- Powdercoated, aluminum tubing with easy-to-install, non-corrosive mounting brackets
- Durable, corrosion-free nylon catch straps provide a more stylish look, as compared to chains
- Comes standard with a TowelMate accessory for hanging up to three towels right where you need them most
Installation / Operating requirements and limitations |
||||||
| rear clearance | side clearance | spa/cabinet shape limitations | mounting location | spa corner shape limitations | type of lift assistance | min. [max.]cover width |
| 18" - 20" | 4" | not for round skirted spas | back of spa | none | fulcrum | |
See the complete Cover Lift Configurater to compare all cover lifters side by side. |
||||||


Click on pictures above for a larger view
Installation Instructions for the Covermate Easy

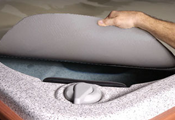
What's actually inside the box.
Step #1
Position the spa cover (in closed position) on the spa, making sure that all four comers are properly positioned and square on the spa.
Step #2
Using the #10x1-1/2" screws, attach the Mounting Brackets to the back side of the spa. (See Fig. 1) Note: Space Mounting Brackets as far apart as possible with a minimum of 36".
Caution: To prevent splitting of wood cabinet, pre-drill holes with a 1/16"drill bit.
Step #3
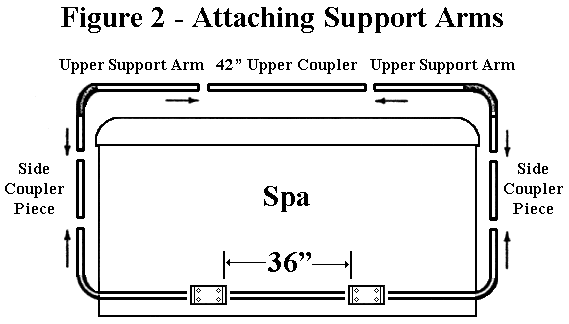
Insert the long end of the lower Support Arms into the Mounting Brackets and a 36" Coupler. (See Fig.2)
Next, insert the upper Support Arms into the upper 42" Coupler Piece. Then join the upper Support Arm Section to the lower Support Arm Section by sliding the short portion of the Support Arms into the side Coupler Piece. When joining the upper Support Arms to the lower Support Arm slip the black nylon Strap over the 36" side Coupler Piece.
Note: Place a #10 self tapping screw into the lower Support Arm next to the outside edge of each Mounting Bracket. This will prevent the Covermate from sliding left or right.
Step #4
Lay the assembled Covermate on the spa cover. Adjust and center the 42" upper Coupler Piece and Support Arms so that the Coupler Piece is lying parallel to the spa cover's hinge about 1/2" away. Position the Side 38" Coupler Pieces in the center of the upper and lower Support Arms and attach with the #10 self tapping screws, Using the #10 self tapping screws, fasten all Support Arms and Coupler Pieces together.
Note: Be sure to rotate the 42" upper Coupler Piece so that the inserted screws are at a horizontal angle with the heads facing the back of the spa.
Repeat this procedure for the lower Coupler Piece.
Step #5
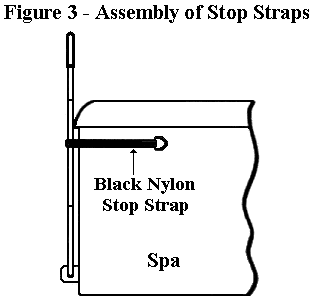
After assembling the Covermate, motion it info the upright vertical position. Using a #1O screw attach the Black Nylon Stop Strap to the wood skirt of the spa. Next, position the opposite end of the Black Nylon Stop Strap on the Coupler Piece so that it is in a horizontal level position using a #10 self tapping Screw, screw the Strap into place. (See Fig.3)
Step #6
Slip the black hand grips to the edge of the spa cover and snap black plastic screw head covers on.
You are done!